Decoupling Your Hardware Vendors in Software
Ah, the good old days of working at a top-tech company. I was tasked with retrofitting an End-Of-Line test system with a proprietary piece of in-house equipment. Part of the program involved replacing outdated equipment with a more complex device while maintaining backward compatibility with existing production lines in the field.
This was somewhat of a painstaking task when it was discovered that the existing software architecture had device calls sprinkled across various parts of the code—from the instrument level to the test sequence and the reporting mechanism. Data types for devices were even embedded into the UI!
The simplest solution would have been to place conditions around the existing code to determine which device to use. However, this approach would have become a maintenance nightmare, making the system difficult to understand and use. It simply wouldn’t scale and would create excessive technical debt for sustaining engineers. No bueno.
Also recall the supply chain crisis during the global pandemic, when test equipment had up to 52-week lead times! Technology leaders had to pivot quickly, substituting hardware for secondary and tertiary sources, leading to software development changes and a whole host of other propagation delays.
These are just some scenarios where a Hardware Abstraction Layer (HAL) becomes incredibly useful. A HAL decouples the instrument drivers from the rest of your test system while providing a common API with equivalent functionality between test instruments. Great HALs can be written with a deep understanding of each test instrument, with functionality often abstracted for the most critical components. This understanding aids in making the best class hierarchy decisions in an architecture.
Today, we are going to demonstrate a simple HAL using a common test setup—a programmable power supply, digital multimeter, and switch card—implemented with none other than National Instruments LabVIEW.
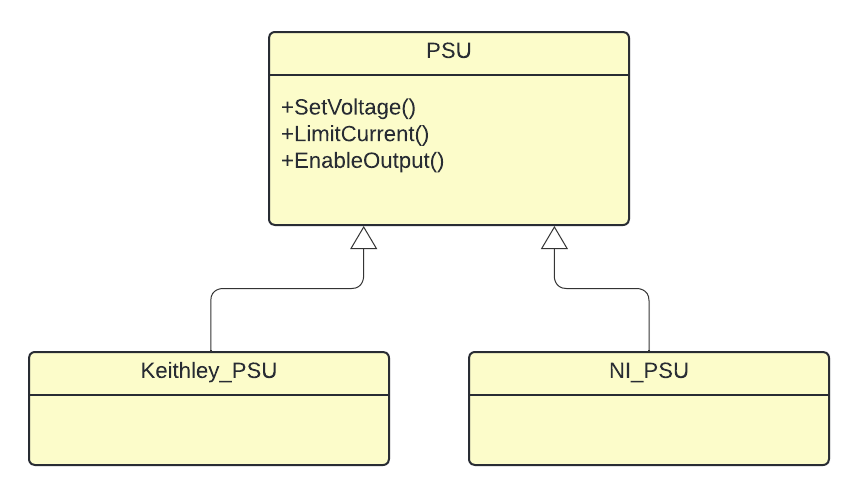
Consider a simple Programmable Power Supply (PSU) instrument. A UML class diagram for a PSU class with some standard functionality might look like so:
Using LabVIEW, we can create the classes of the base PSU class, override them in Keithley_PSU and NI_PSU, while implementing driver-specific logic in those child classes. Now you can call your common PSU API at your sequence level, without it having any knowledge of the vendor-specific device!
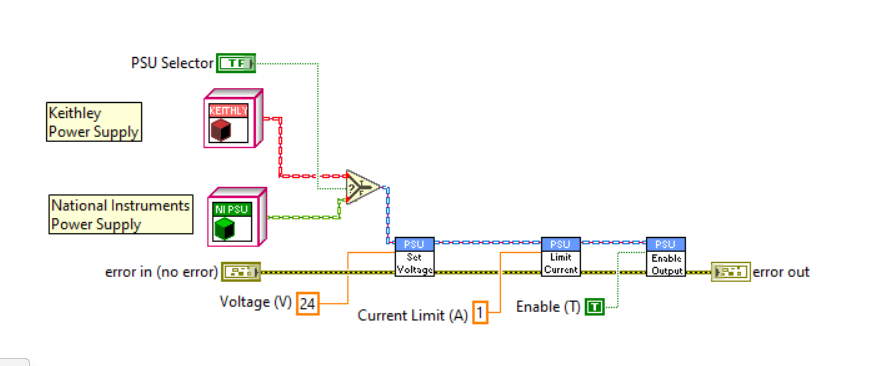
Here's an example of how your block diagram may look like for setting 24V DC, 1A current limit and enabling its output:
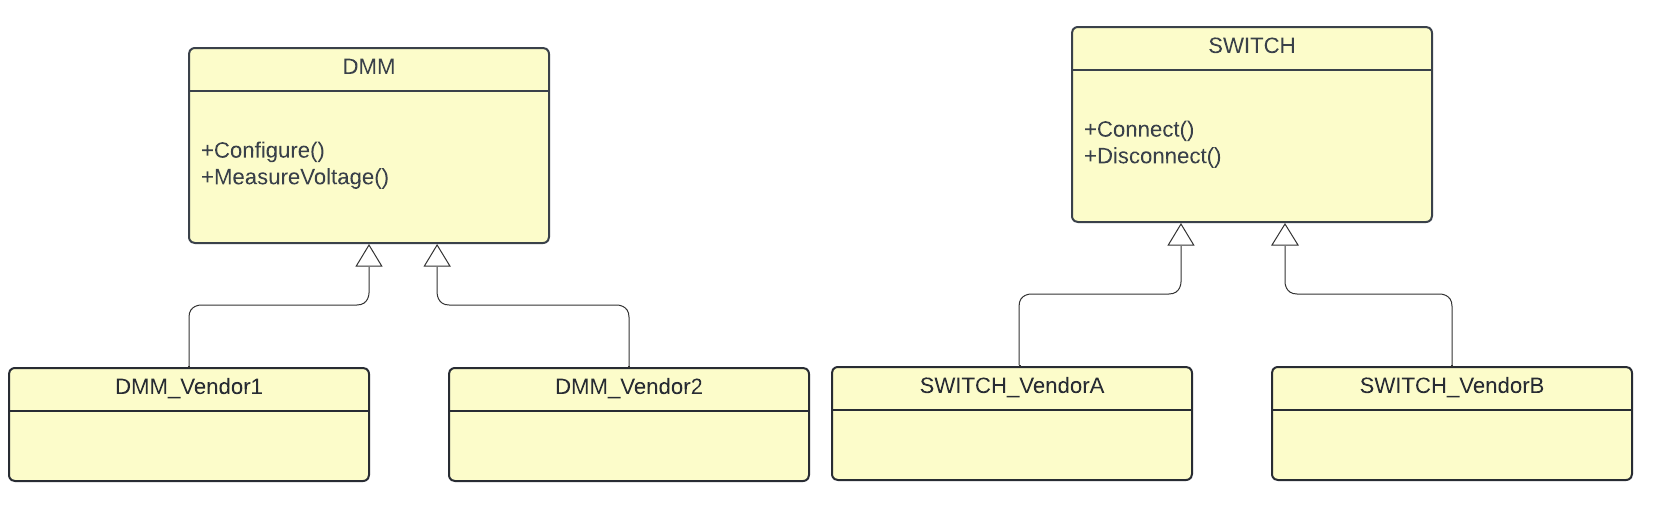
Similarly, with a Digital Multimeter (DMM) and Switch card, your class design may look comparable to that of the PSU. Your UML class diagram could look something like this:
Now suppose you had a more complex device, such as a multifunction data acquisition module that was comprised of a DMM and a Switch module. How could you re-use the Switch and DMM device, combining them to create a DAQ device with LabVIEW?
Enter Interfaces.
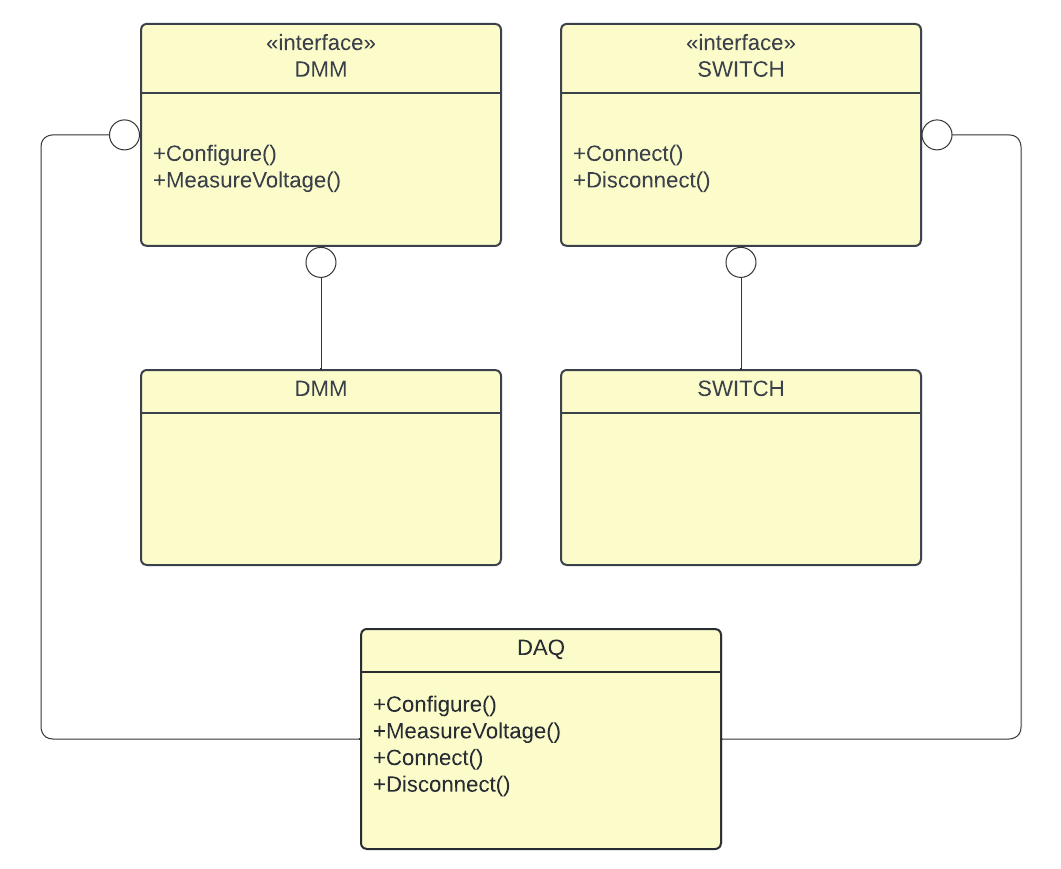
National Instruments introduced Interfaces to LabVIEW in 2020 , allowing for multiple class inheritance. This means that DMM and Switch devices could be made into interfaces, with corresponding classes using each interface. Finally a DAQ device could implement both DMM and Switch interfaces. A UML diagram might look like the following:
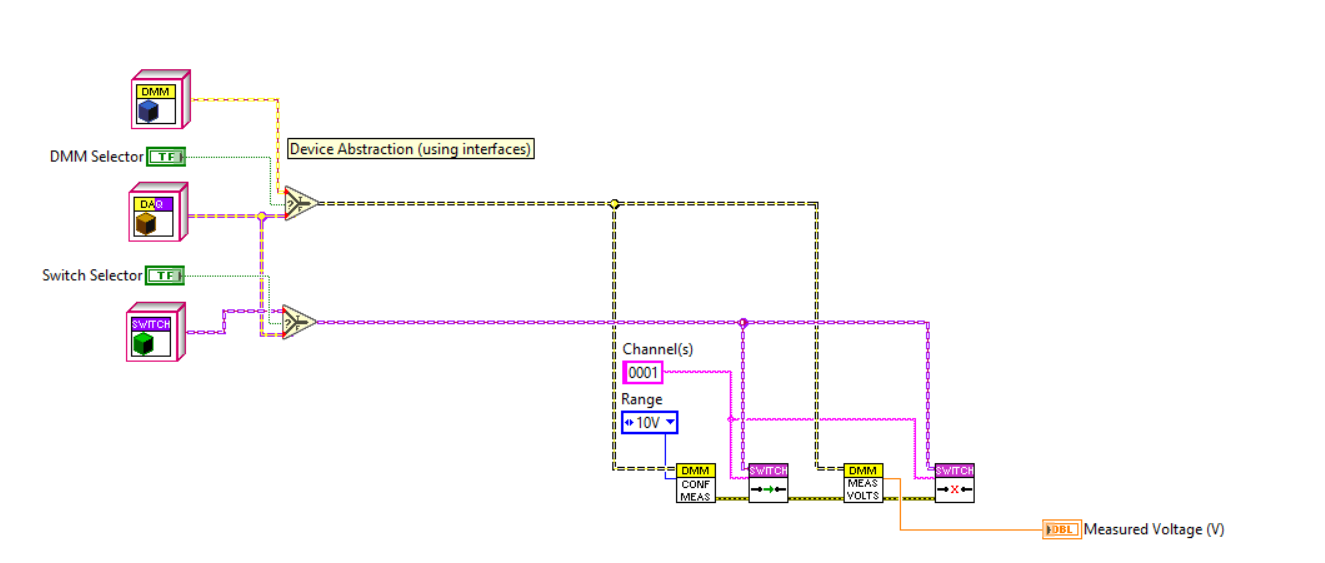
This becomes incredibly handy if your device has multi-functions, such as connecting MUX, Matrix or Relays, taking a measurement and disconnecting. Using LabVIEW, here's how your block diagram may look:
In the example above, your DMM functions could come from both a DMM and DAQ device, while your Switch functions could come from either DAQ or Switch. Vendor-specific implementations would go in their corresponding classes. LabVIEW interface VIs must all be overriden by classes that implement them, and interfaces can also inherit from other interfaces.
Just as importantly, here's
how to create LabVIEW classes and interfaces
Advantages
Test Team Familiarity
- Having generic device calls throughout your Test Sequences makes for simpler readability and standardization across your manufacturing test team. Your team does not require an understanding on all device specifics, but rather an understanding of the API functionality that abstracts away vendor implementation.
Updating a test sequence for a new instrument or obsolete instrument
- This task mainly consists of creating a new device class, implementing its vendor-specific functionality, and then adding it to your instrument selection list. No other piece of code should be touched, unless your HAL API needs to include a specific function of the new device that's not already covered. In that scenario, only configuration or database information would require updating.
Clean Code
- Just as importantly, not having various conditions and corner cases scattered throughout your application to handle custom logic. Keeping technical debt at an absolute minimum will help make for a happier team, especially your sustaining engineers.
Summary
A HAL can provide a powerful, scalable software solution that will mitigate technical debt down the road. While there may be additional up-front architecture design and development time, this level of abstraction can pay significant dividends if properly designed. Consider scope changes, device obsolescence and spare part availability when designing your test system.